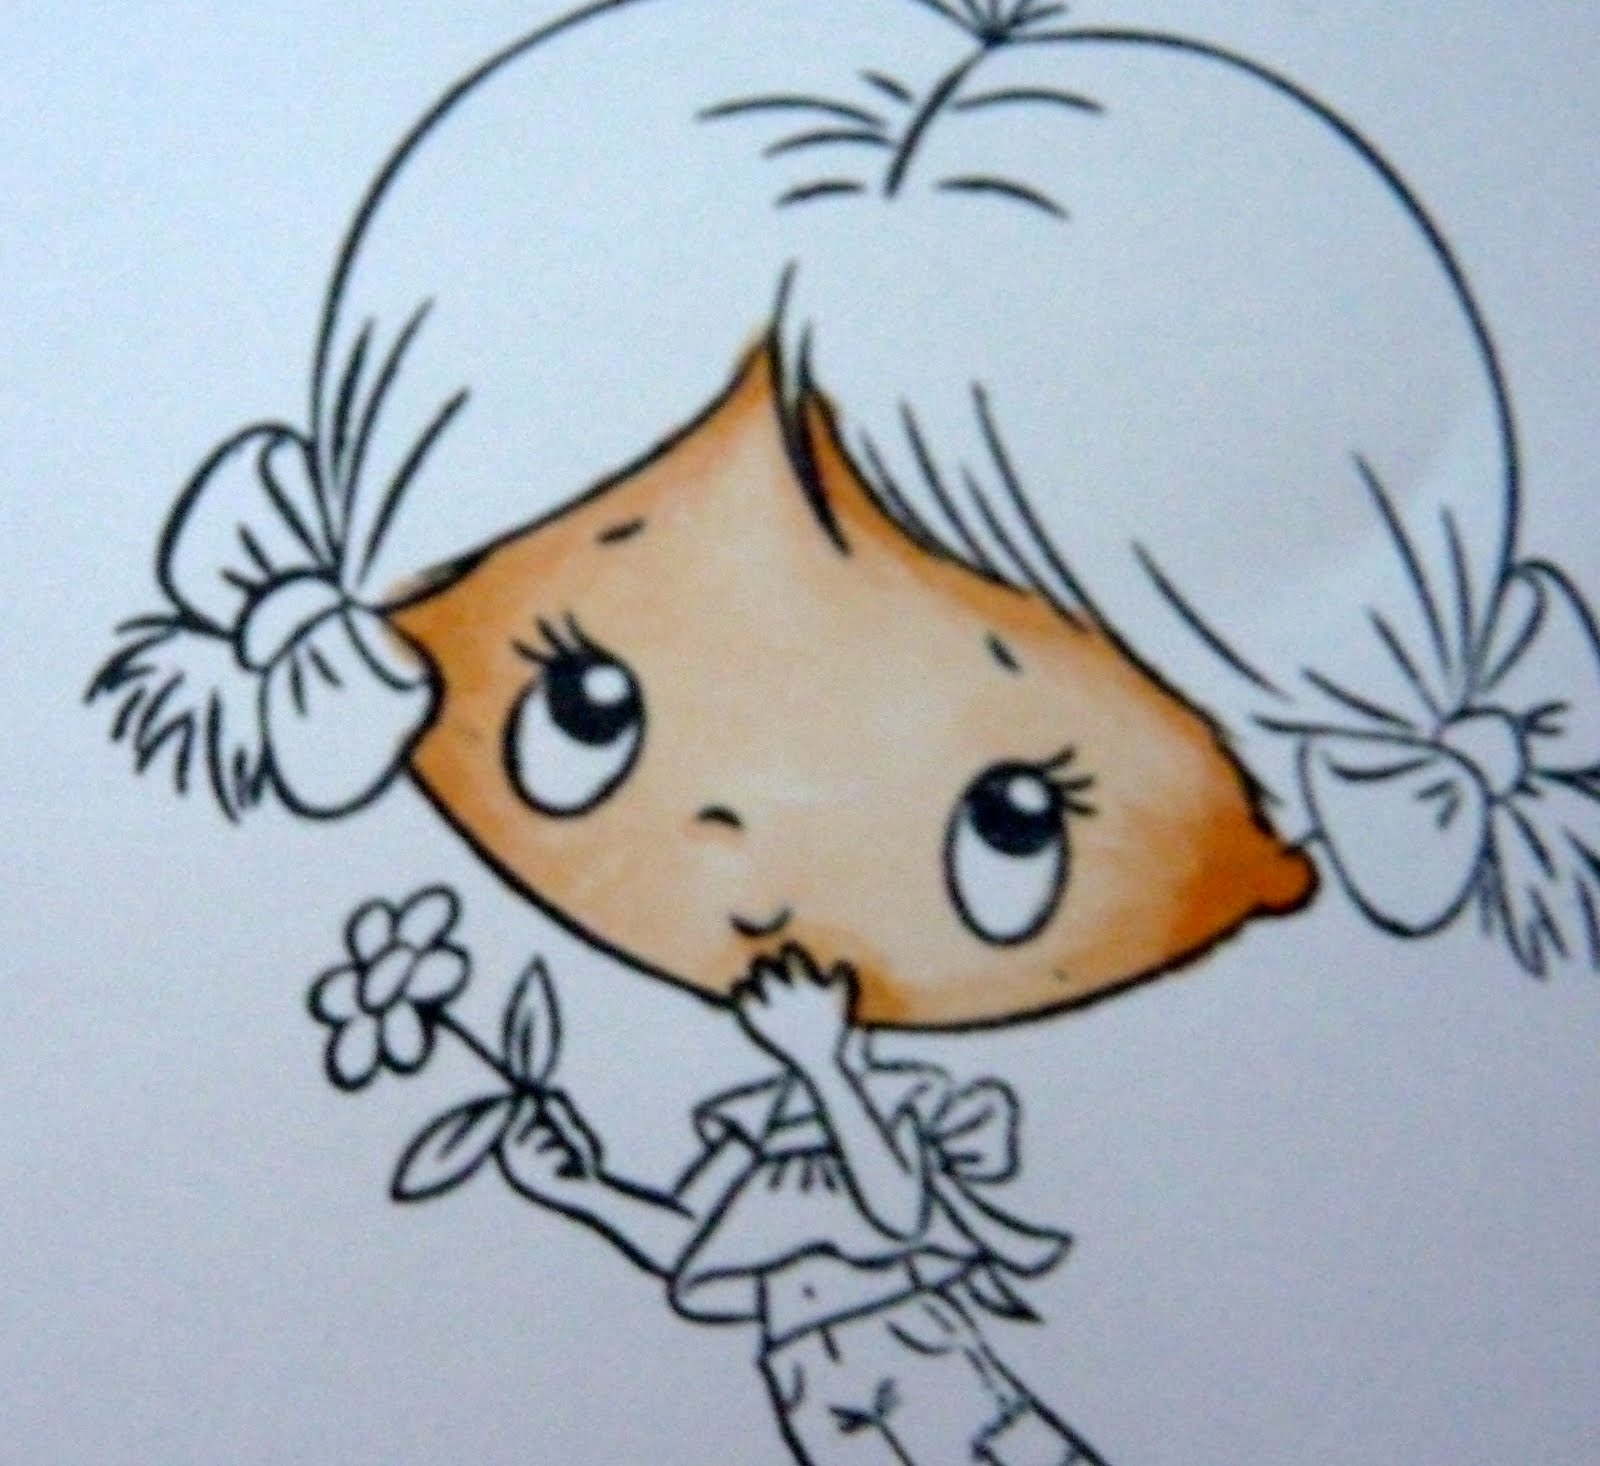
Saturday 6 August 2011

black haired Sugar Nellie in Spectrum Noir Pens


these are just too sweet for words the Sugar Nellie stamps

i had ago at black hair and shoes this time using the same strokes that i used in hair tutorial ... with Spectrum Noir Pens
here is the list of colours i used

skin and face.....132..141..142..136
hair....CG3..CG5..CG7..120
coat + bows on shoes...86..85..88..69
dolls hair..37..35..104
socks.. 0.. BG3
dolls dress and leggings...122..22..124
seat..100..96

thank you for dropping by today
hugs linda xx
Posted by Picasa

had a little colouring session

this little darling from Sugar Nellie dropped on my mat today along side some of her friends
i just had to stamp her up and get colouring in
im so fastinated in how with colour you can turn a flat image into 3d

i used the Spectrun Noir skin tones and tourquise pack
the blender pen and colours 141..142...104...100 and tiny touch of 96 in hair
added a few shadows with the mauve shadow colour 146
im off to colour some more
thank you for dropping by today
hugs linda xxx
Posted by Picasa

Friday 5 August 2011

Spectrum Noir Skin Tutorial on Swalk Stamps


Colouring skin


stamped the image with Momento black ink
now lets start these steps will add lots of shape in small area's must say sorry i gave you  a wrong colour for cheeks it should read colour 137

firstly  cover face in 132
then  just on corners near bow and side of eyes from ears useing  light flicking strokes
starting at the edge and flicking inwards to eyes lay down  more colour with 132 it will darken this area alittle
then with 133 and small flicking strokes go all around the outside edges same as befor go from outside inwards
dont cover all the area  around the eyes with this colour

here  i used the CG2  with small dots go in to the areas near the ear hairline and at the bows and on underside of the chin to hand this will add  shadows  ...add the pink with small dots for cheeks
ok i went out of the lines again!!!!!!!!  how bad is that lol.

finally go all over the whole area with 132 in light strokes
add 0 to eye area and while wet add 143 just around the pupil

all done...
as you can see the colours on face are all dry now it has settled down to a even blend all over 
 if you think your image  looks blotchy  leave it to dry 
 go back all over with light strokes in 132 to even it out... but don't over work it.
hope this helps with colouring in faces on Swalk Stamps
 i promise next time to stay in the lines lol
thank you for dropping by
hugs linda xxx


Posted by Picasa

Rabbit colouring tutorial in Spectrum Noir


here are the colors i have used  from the Spectrum Noir
i first stamped  this lovely image from Crafters Companion  the Beatrix Potter range in momento black ink


i coloured all the rabbits in useing 134


then with small light flicking strokes around the edges with  36 and then added 9 for inside of ears
do try to go in the direction of the  fur this is the start of getting some dimension
into the image


 then useing 104 i went over the area still with the same flicking strokes adding depth to the image
mainly around the edges and where  there would be shade


with WG3 and little dots go into the areas where you think it will be darkest
 keep dots close as you can but  dont cover all your other layers
this will give you the look of fur


now with your light colour134 go all over  the rabbits in light strokes
to blend some of the marks in from previous layers
if you loose them just put them back in


here i started on the jug and bowl using 0 first i went around the edges
while it was still wet  i added 178 this will give you a very soft edge and some shadow to the sides of the bowl and jug if its too light once dry add some more 178 with light strokes
i also added 178 to the cloths around rabbits neck just in shaded areas
then the basket   coloured that in with32..33..31 just to get some shape to it


here i coloured in the leaves with  48..163..42 blending all the colours together with 163
i coloured in the beetroots with 83..81..and tiny touch of 69 for deep shadows
then with WG3 put in the ground around the image added some WG4 to get some extra depth just in the corners under the leaves and back of the basket


finally i went around the out side of the image
with 0 the blender pen and while wet i added 143 for the sky   its hardly visable once dry
 but its there
in some of the small areas like under the tail on left hand rabbit i added just a touch more of 143 so it was darker ..

 its all finished ready to make into a card
i will try and complete the card  over the weekend
thank you for dropping by today
hugs linda x
Posted by Picasa

Wednesday 3 August 2011

Honey Blonde step by step hair tutorial


Honey Blonde Hair in Spectrum Noir Pens
right lets get colouring in
cover all the area with your light colour 141
yes it looks blotchy ......dont worry about it not being smooth as your going to work over the top
with the  middle tone 32 using little flicking strokes lay the colour down in the direction of the hair 
i started at the bow and worked up  turned image round then from crown worked down 
Do try to save some light area as this adds shape and form to your image
repeat on the other side of the hair
at this point  you can add more  32 colour to the areas you think can go darker
 such as the crown and near the bows

next step is the dark tone  i used 104  go in with same flicking strokes to the darkest areas to get some depth and shadow remember every layer of colour you add must be a smaller than the last layer
finally  go over it all in your lightest colour 141 using light strokes with chisel end it will all blend together to give a smooth effect  
you might loose some of your lines but dont panic just put them back in 
the colours look very strong in pictures . that's because the ink is still wet im taking pictures as i go .....once it dries it goes lighter...
hope this will help you achieve getting highlights  shape and form in to your hair with the pens you can apply this method to any hair colour you choose

ok dont all shout at me!!! i didn't stay in the lines ... hey we can resolve that with the blender pen lol.....
finished her  now she is ready for a card

thank you for popping by today 
hugs linda xxxx
Posted by Picasa